If you are developing applications that you need to deploy on kubernetes clusters, it is worth it to run a complete kubernetes environment as part of your development setup. This will help you to have a complete and consistent development workflow by including kubernetes specific aspects continuously before going live.
But running a kubernetes cluster is resource hungry, and this is not so simple to set up. So it is not a very usable option for your local env.
Fortunately, there are some lightweight options you may consider, and we will review some of them. I will focus on solutions that run with docker, as I think it is the easier way to have a k8 cluster running locally.
Minikube
Let’s start with the first solution brought by kubernetes itself : Minikube.
Minikube can either run on local virtualmachines using a vm hypervisor like kvm or virtualbox,
but it also can run on docker if you provide the following option : --vm-driver=none.
Following the installation instructions, you’ll be able to start a local kubernetes cluster running with docker using this command :
➜  ~ sudo minikube start --vm-driver=none
😄  minikube v1.2.0 on linux (amd64)
🔥  Creating none VM (CPUs=2, Memory=2048MB, Disk=20000MB) ...
🐳  Configuring environment for Kubernetes v1.15.0 on Docker 18.09.3
    ▪ kubelet.resolv-conf=/run/systemd/resolve/resolv.conf
🚜  Pulling images ...
🚀  Launching Kubernetes ...
🤹  Configuring local host environment ...

⚠️  The 'none' driver provides limited isolation and may reduce system security and reliability.
⚠️  For more information, see:
👉  https://github.com/kubernetes/minikube/blob/master/docs/vmdriver-none.md

⚠️  kubectl and minikube configuration will be stored in /home/marem
⚠️  To use kubectl or minikube commands as your own user, you may
⚠️  need to relocate them. For example, to overwrite your own settings:

    ▪ sudo mv /home/marem/.kube /home/marem/.minikube $HOME
    ▪ sudo chown -R $USER $HOME/.kube $HOME/.minikube

💡  This can also be done automatically by setting the env var CHANGE_MINIKUBE_NONE_USER=true
⌛  Verifying: apiserver proxy etcd scheduler controller dns
🏄  Done! kubectl is now configured to use "minikube"
That’s it, you have a one node k8 cluster ready to use :
➜  ~ sudo kubectl get nodes
NAME       STATUS   ROLES    AGE    VERSION
minikube   Ready    <none>   110s   v1.15.0
When you are down you can delete your cluster using this command :
➜  ~ sudo minikube delete
🔄  Uninstalling Kubernetes v1.15.0 using kubeadm ...
🔥  Deleting "minikube" from none ...
💔  The "minikube" cluster has been deleted.
Quite easy no ? Let’s continue with an other solution which may be even simple to use : k3d
k3s with k3d
If you are familiar with kubernetes ecosystem, you may have heard about k3s.
k3s is an opinionated lightweight kubernetes that suits for IoT and CI usages, so it is a perfect fit for local development too as it requires much less resources that a standard k8 cluster.
k3s is an opensource project backed by rancher :
https://github.com/rancher/k3s
And it is also a kubernetes certified distribution.
k3s in docker = k3d
If you want to run k3s locally using docker, there is a wrapper project for that :
https://github.com/rancher/k3d.
k3d is packaged as binary. You can grab it and install it using a curl command :
wget -q -O - https://raw.githubusercontent.com/rancher/k3d/master/install.sh | bash
Or if you are familiar with go :
go install github.com/rancher/k3d
Running a k3s cluster using k3d is as easy as running this command :
➜  ~ k3d create
2019/07/10 10:37:37 Created cluster network with ID 09e1346c158e45b46b6d69832414d6a693447af2a8cd970ef0f5f98009d5a825
2019/07/10 10:37:37 Creating cluster [k3s-default]
2019/07/10 10:37:37 Creating server using docker.io/rancher/k3s:latest...
2019/07/10 10:37:37 Pulling image docker.io/rancher/k3s:latest...
2019/07/10 10:37:45 SUCCESS: created cluster [k3s-default]
2019/07/10 10:37:45 You can now use the cluster with:

export KUBECONFIG="$(k3d get-kubeconfig --name='k3s-default')"
kubectl cluster-info
As stated in the command output, you have to set your kubeconfig for kubectl usage :
➜ ~ export KUBECONFIG="$(k3d get-kubeconfig --name='k3s-default')"
And you are done :
➜  ~ kubectl get nodes
NAME                     STATUS   ROLES    AGE   VERSION
k3d-k3s-default-server   Ready    <none>   57s   v1.14.1-k3s.4

➜  ~ kubectl get pods --all-namespaces
NAMESPACE     NAME                             READY   STATUS      RESTARTS   AGE
kube-system   coredns-857cdbd8b4-4tw7j         1/1     Running     0          3m59s
kube-system   helm-install-traefik-h5jkb       0/1     Completed   0          3m59s
kube-system   svclb-traefik-779d88d8c4-7vnfv   2/2     Running     0          3m45s
kube-system   traefik-55bd9646fc-nw42z         1/1     Running     0          3m45s
But wait, there is more ;-)
If you want to test on conditions closer to production, you can setup a multinode cluster with k3d :
➜ ~ k3d create --workers 3
➜  ~ kubectl get nodes
NAME                       STATUS   ROLES    AGE     VERSION
k3d-k3s-default-server     Ready    <none>   2m14s   v1.14.1-k3s.4
k3d-k3s-default-worker-0   Ready    <none>   2m14s   v1.14.1-k3s.4
k3d-k3s-default-worker-1   Ready    <none>   2m14s   v1.14.1-k3s.4
k3d-k3s-default-worker-2   Ready    <none>   2m14s   v1.14.1-k3s.4
k3s is a very cool project if you want a minimal ready to use kubernetes cluster.
On the other hand if you are more fond of all-in-one enterprise solution, you can check solutions
like rancher rke or openshift okd
Openshift
Speaking of Openshift, you also have an easy way to setup a local openshift cluster running with docker.
Just download the openshift client (oc) following instructions on this page.
Then, you can start your cluster with this command :
oc cluster up
Once started, you can login as an admin and list the available cluster nodes :
oc login -u system:admin

oc get nodes
NAME        STATUS    ROLES     AGE       VERSION
localhost   Ready     <none>    11m       v1.11.0+d4cacc0
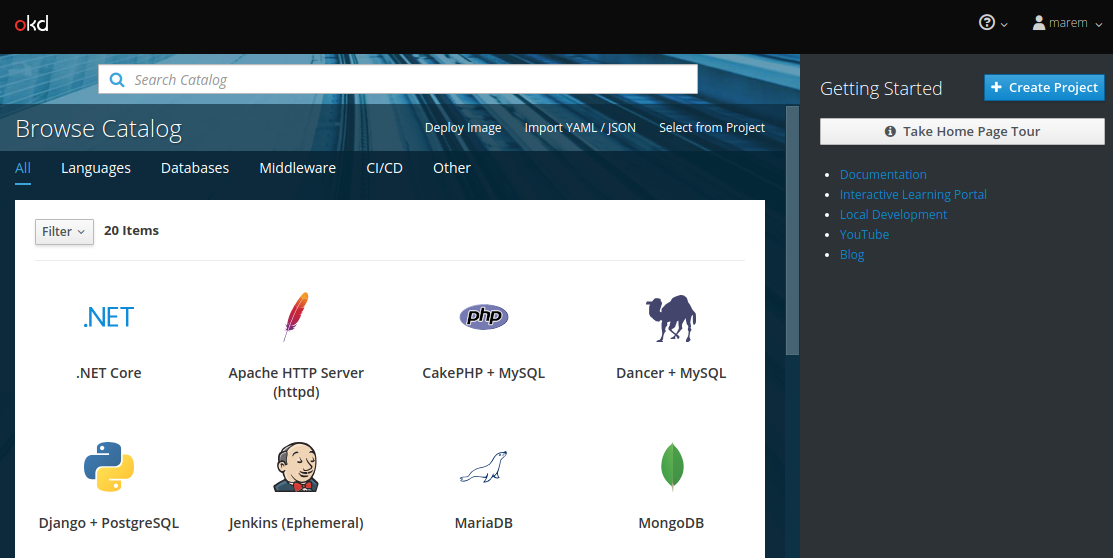
And you can access the webui on : https://127.0.0.1:8443/
Conclusion
It is important to include the deployment and test on kubernetes as part of your development workflow. You have multiple options based on docker for that, just pick one depending on which distribution you work on for your production.